Here are step-by-step steps for creating an order in our warehouse management system, Extensiv.
Please note that Extensiv works best on your PC and in your Chrome browser.
Instructional video for on-demand creation:
You log on to the backend from the front page GorillaVoruhus.is by choosing Log in.
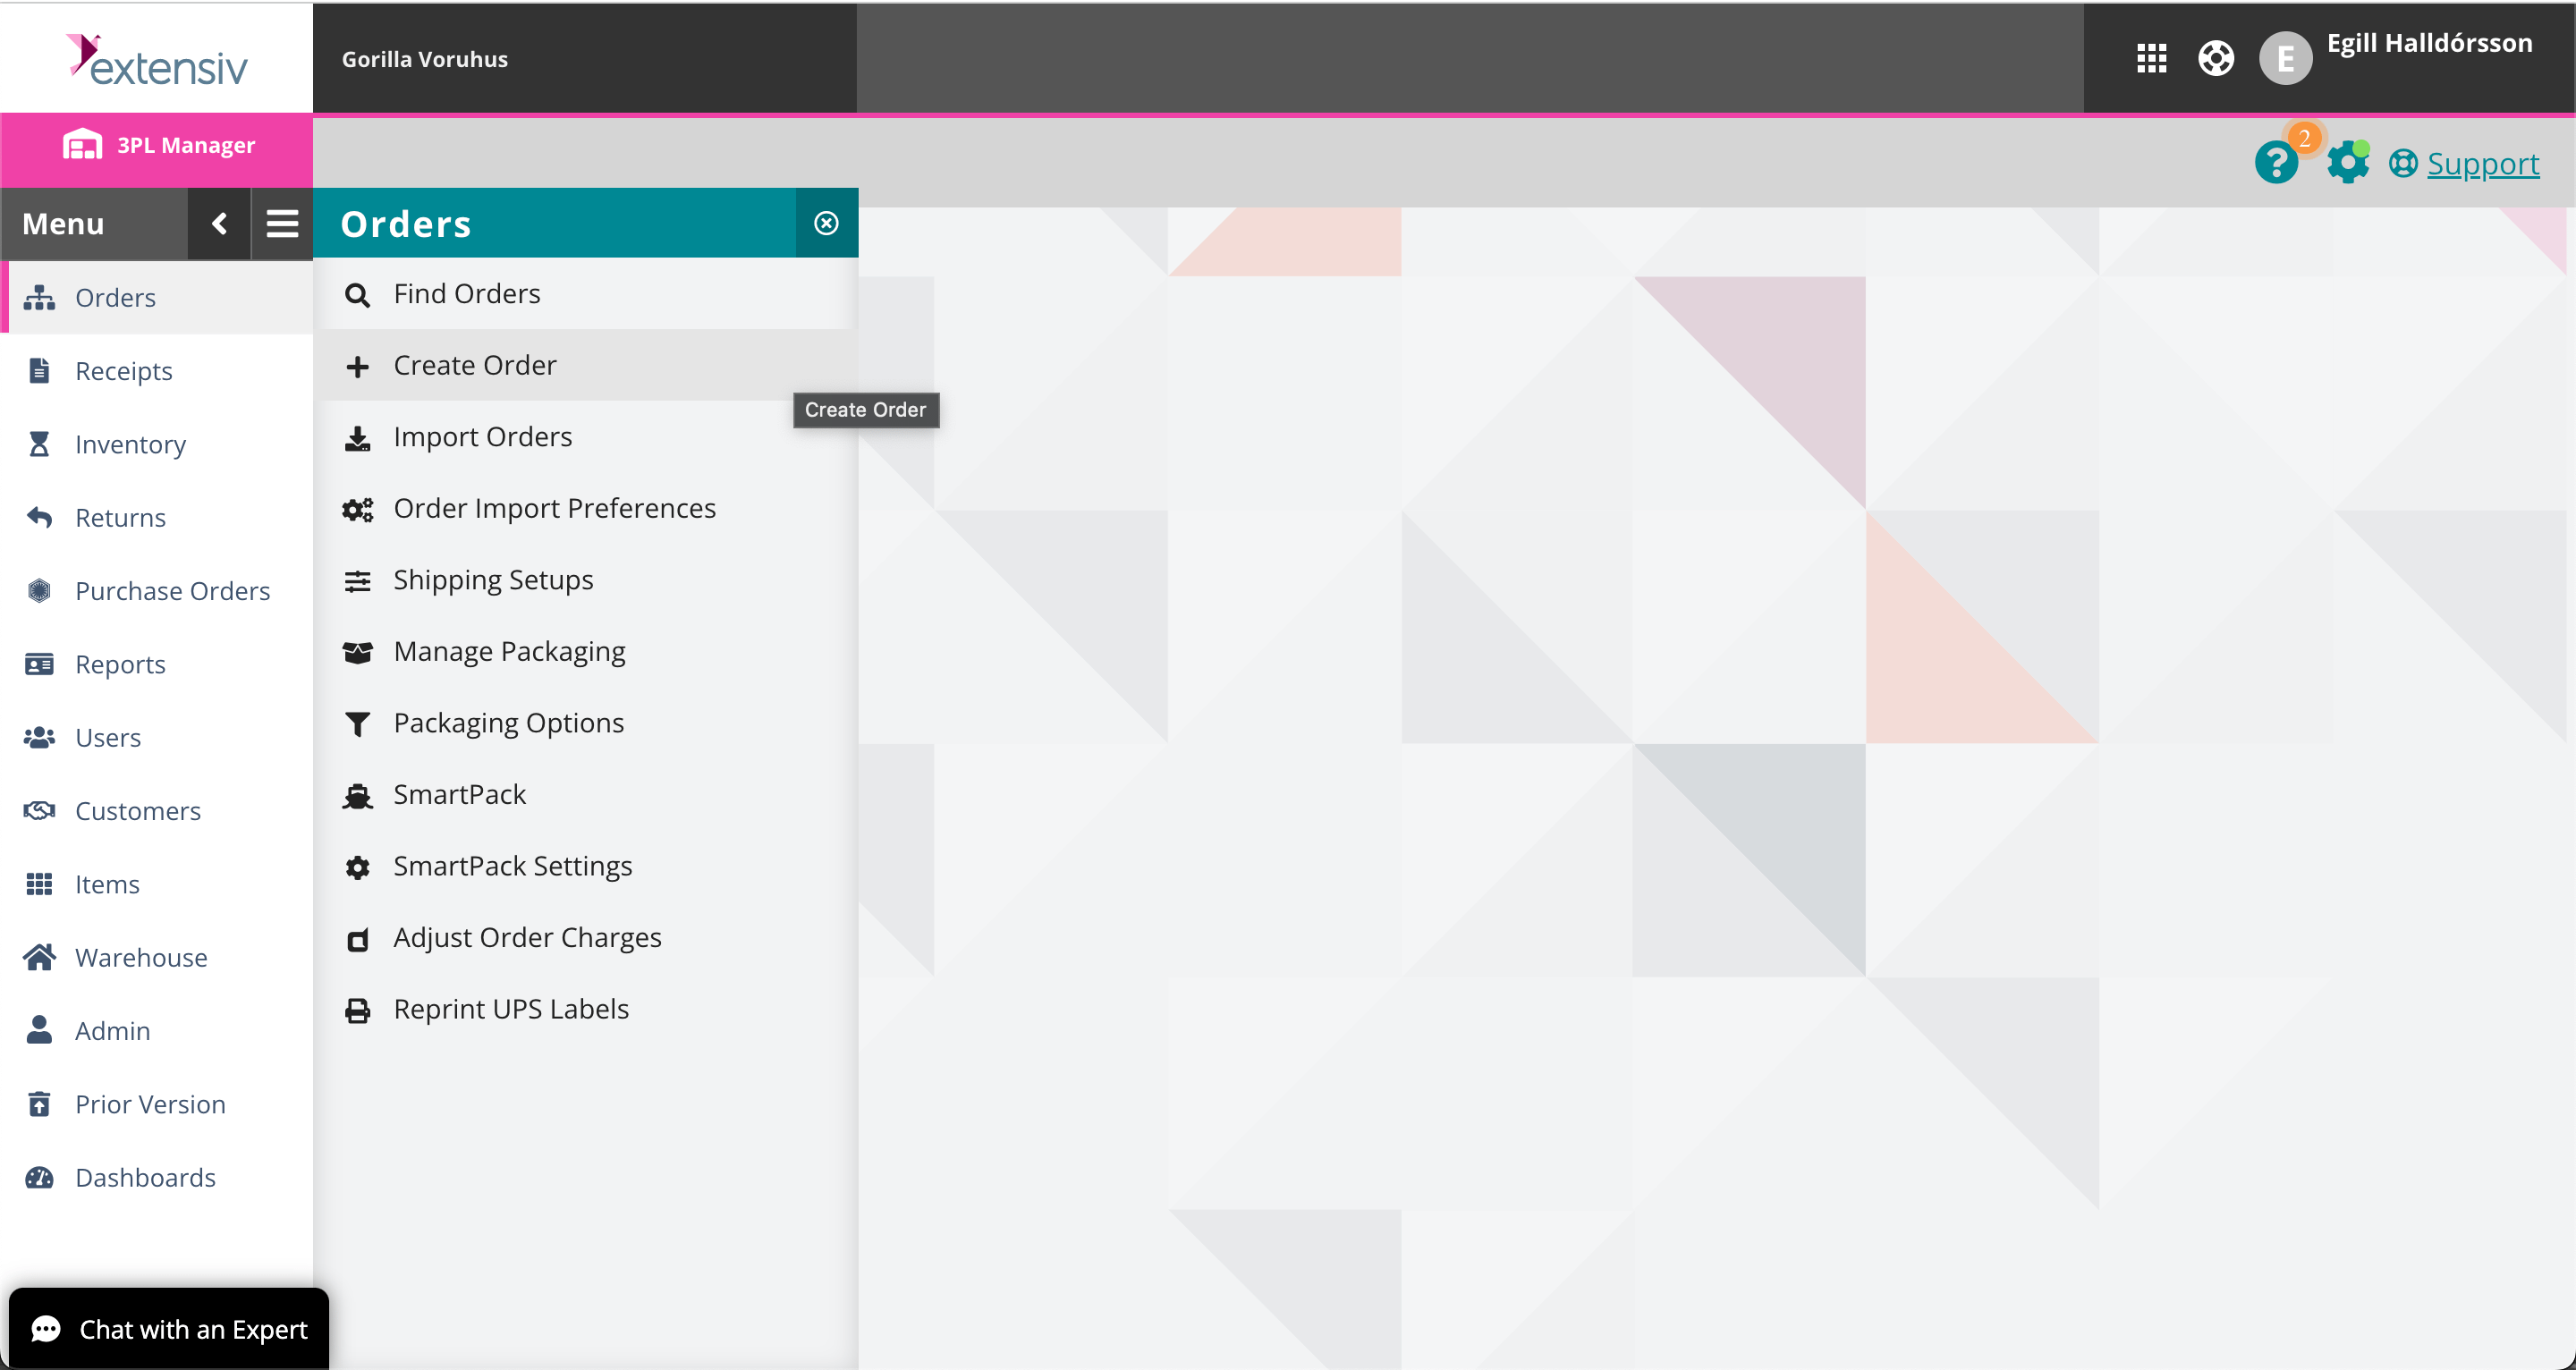
1. First select "Orders" which is at the top, left of the main menu and then "Create Order".
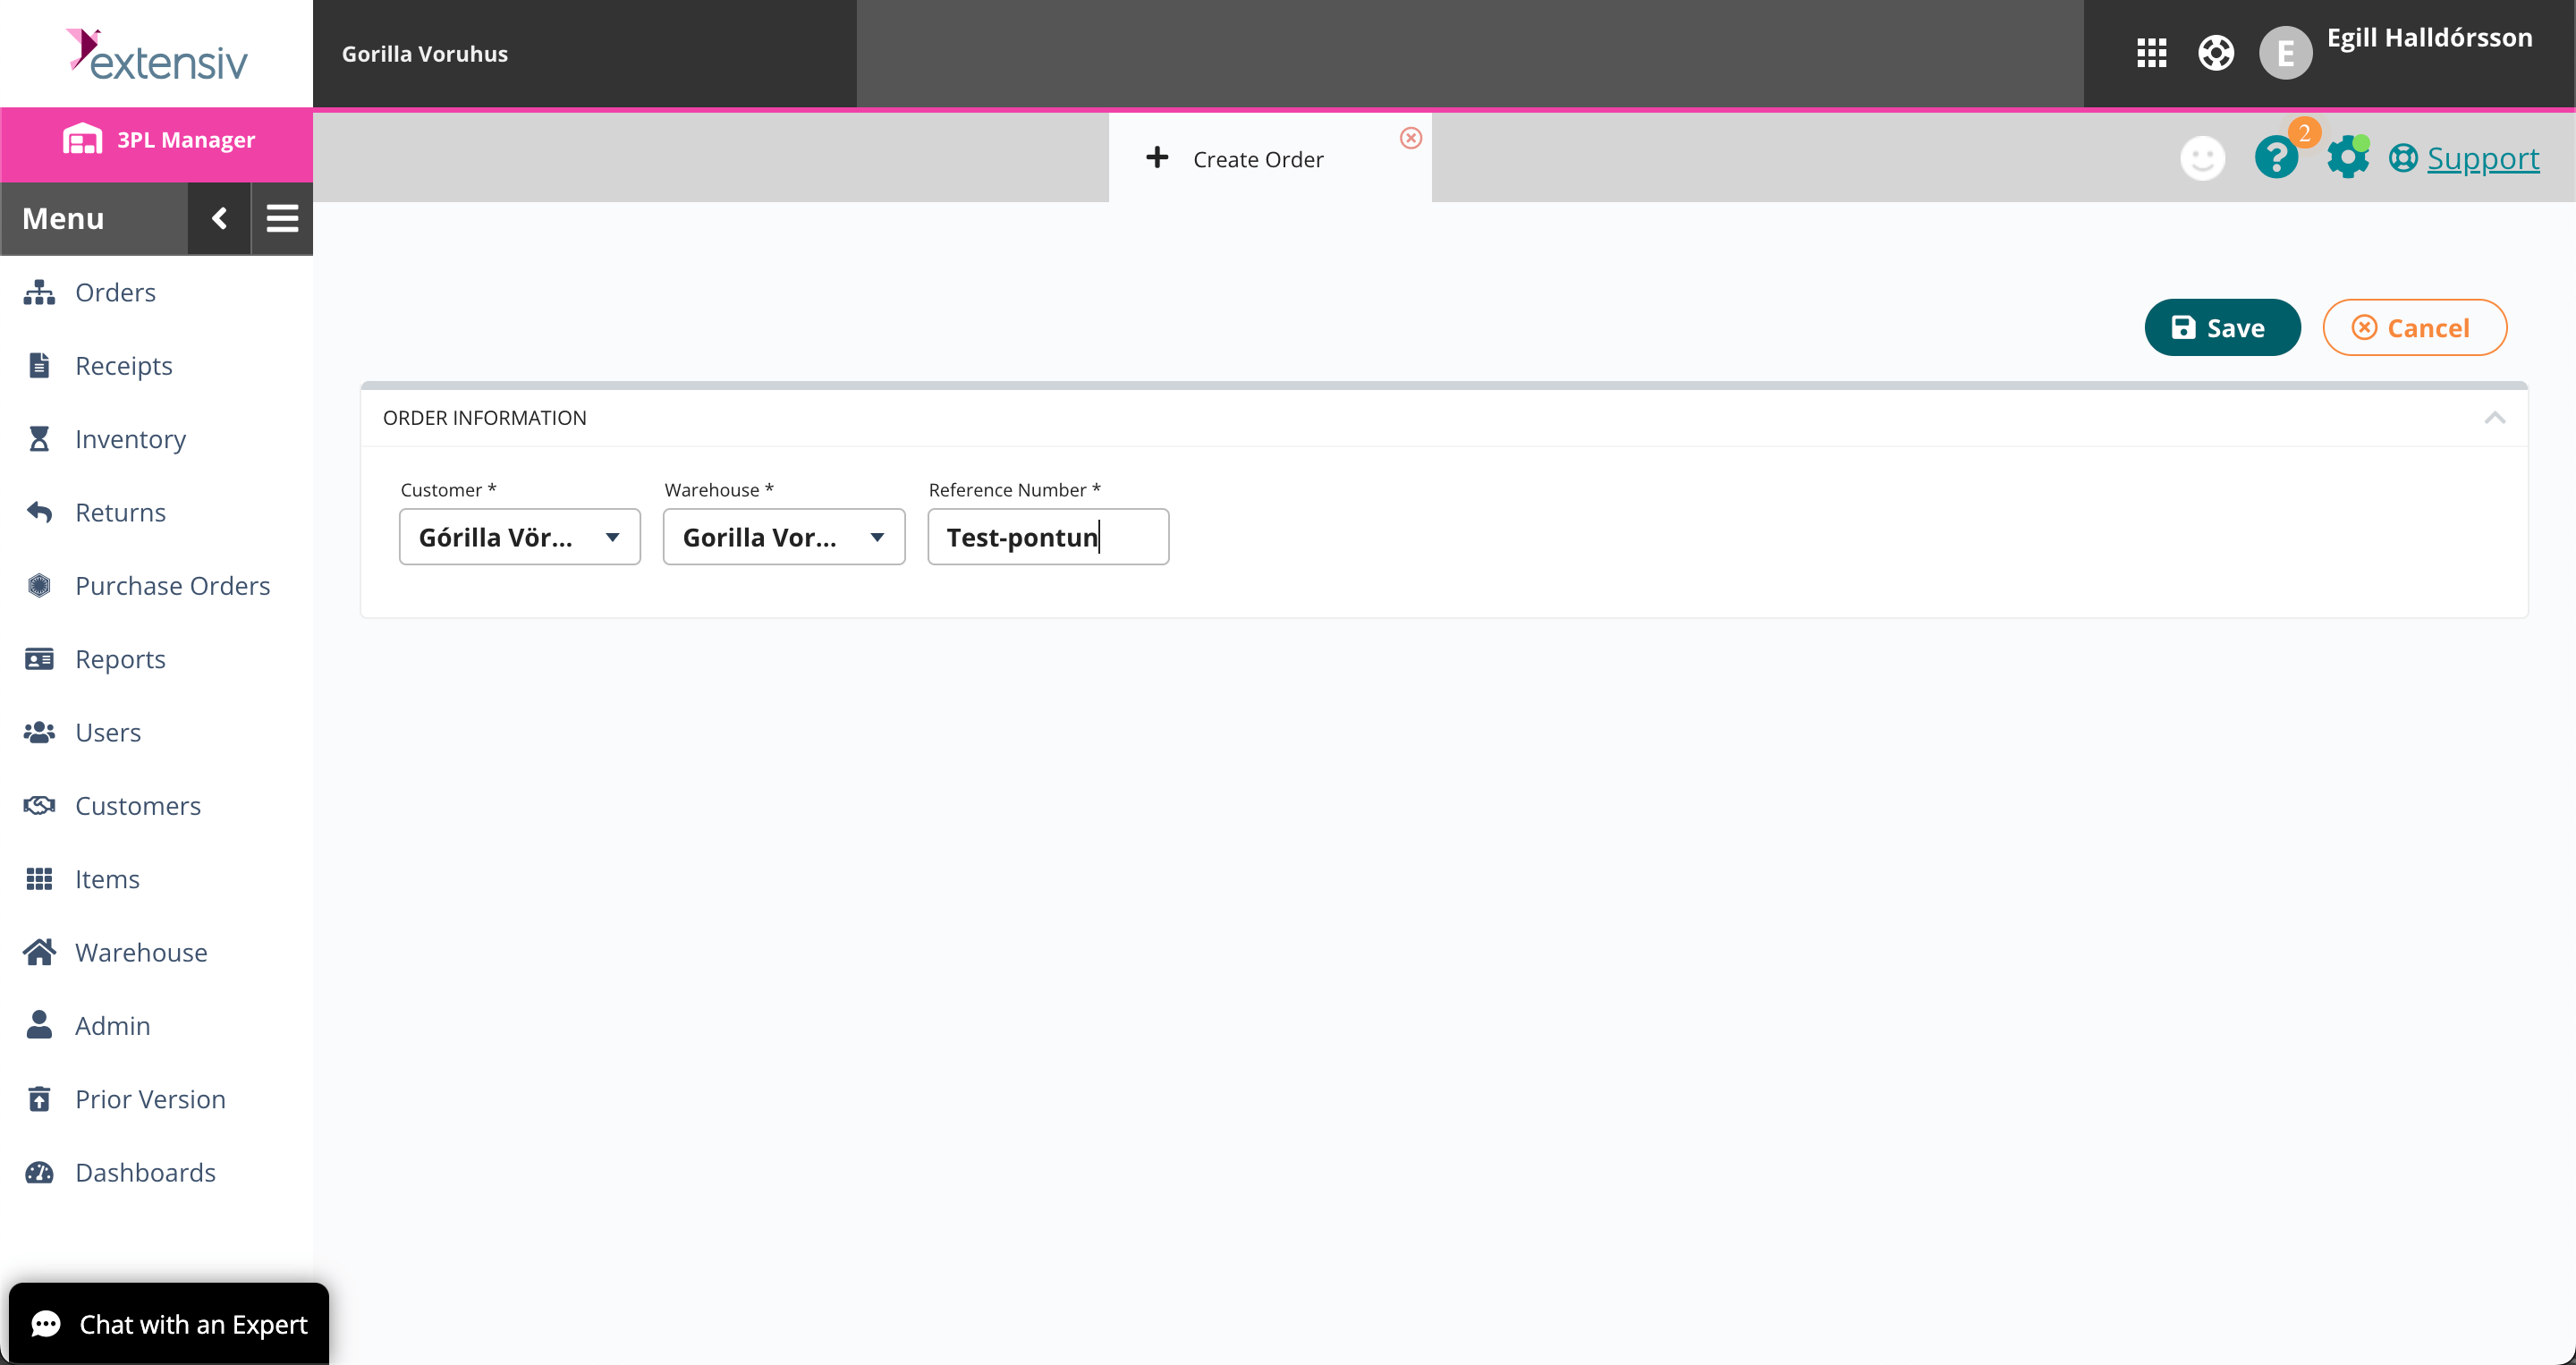
2. Next, you select your company and create a reference number
"Reference number" can be any number, but note that the same order number cannot be used more than once.
We recommend using any system or organization of order numbers. This will help you keep track of your orders.
To continue, click "Save".
3. Order page
On the order page you fill in information about the recipient, which items should be on order and which delivery method you want to use. Note that there are many fields on this page that can be filled in, but you only need to fill in parts of them as we show in this article.
At the top of the page are the shortcut buttons we are going to use. These buttons take you to the next steps in the process of creating an order.
-
- Order Contact Details: Recipient Information (Name, Address, Phone Number etc.)
-
- Order Line Items: The item number (SKU) on order along with the number of pieces of each SKU.
-
- Carrier and Routing: Selection of shipping route.

4. Upplýsingar um tengiliði panta
Here you fill in information about the order recipient.
Mandatory fields to be filled:
– Company Name (Recipient name. Always use company name if shipment goes to company)
– Recipient Name (Important, same recipient name again)
– Telephone number and e-mail address
– Address 1, Country, City, Postal Code
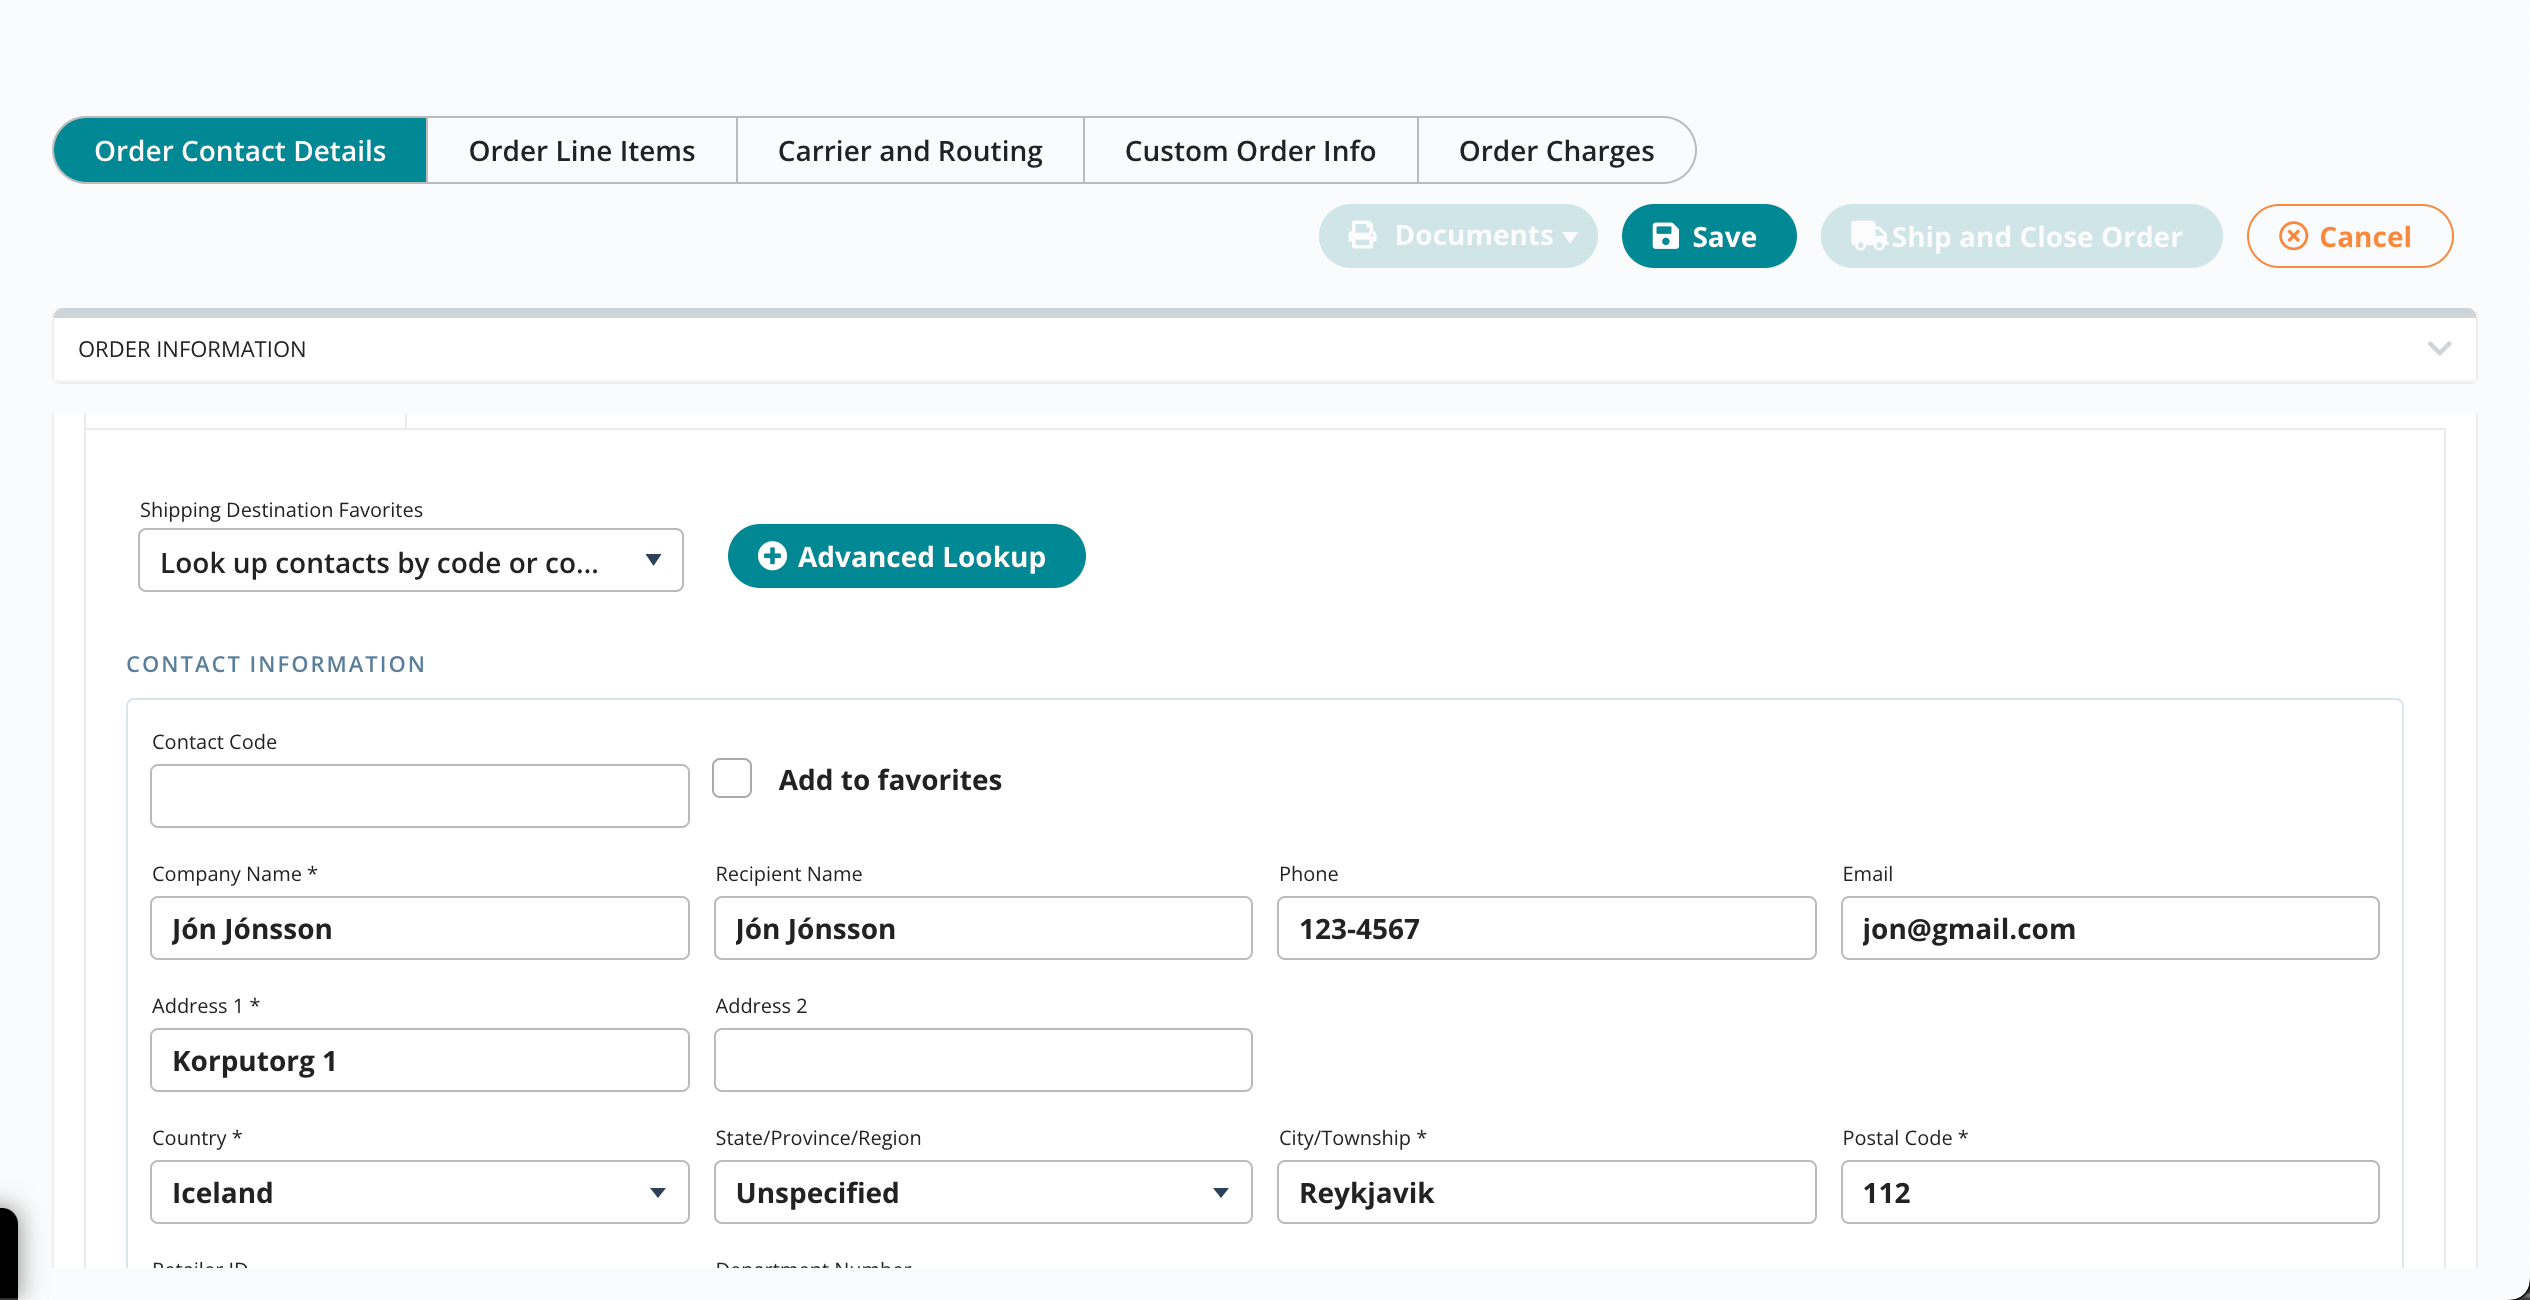
You do not have to fill in any other fields.
Note: Telephone number and email address are required for notifications. Missing orders for phone number or email address are not processed.
Tip: You can check "Add to favorites" to save a contact. Then you don't have to fill in this information again and again if the same customer orders from you regularly.
When you have completed your 'Order Contact Details' you can select the shortcut 'Order Line Items'.
5. Vörur í pöntunarlínu
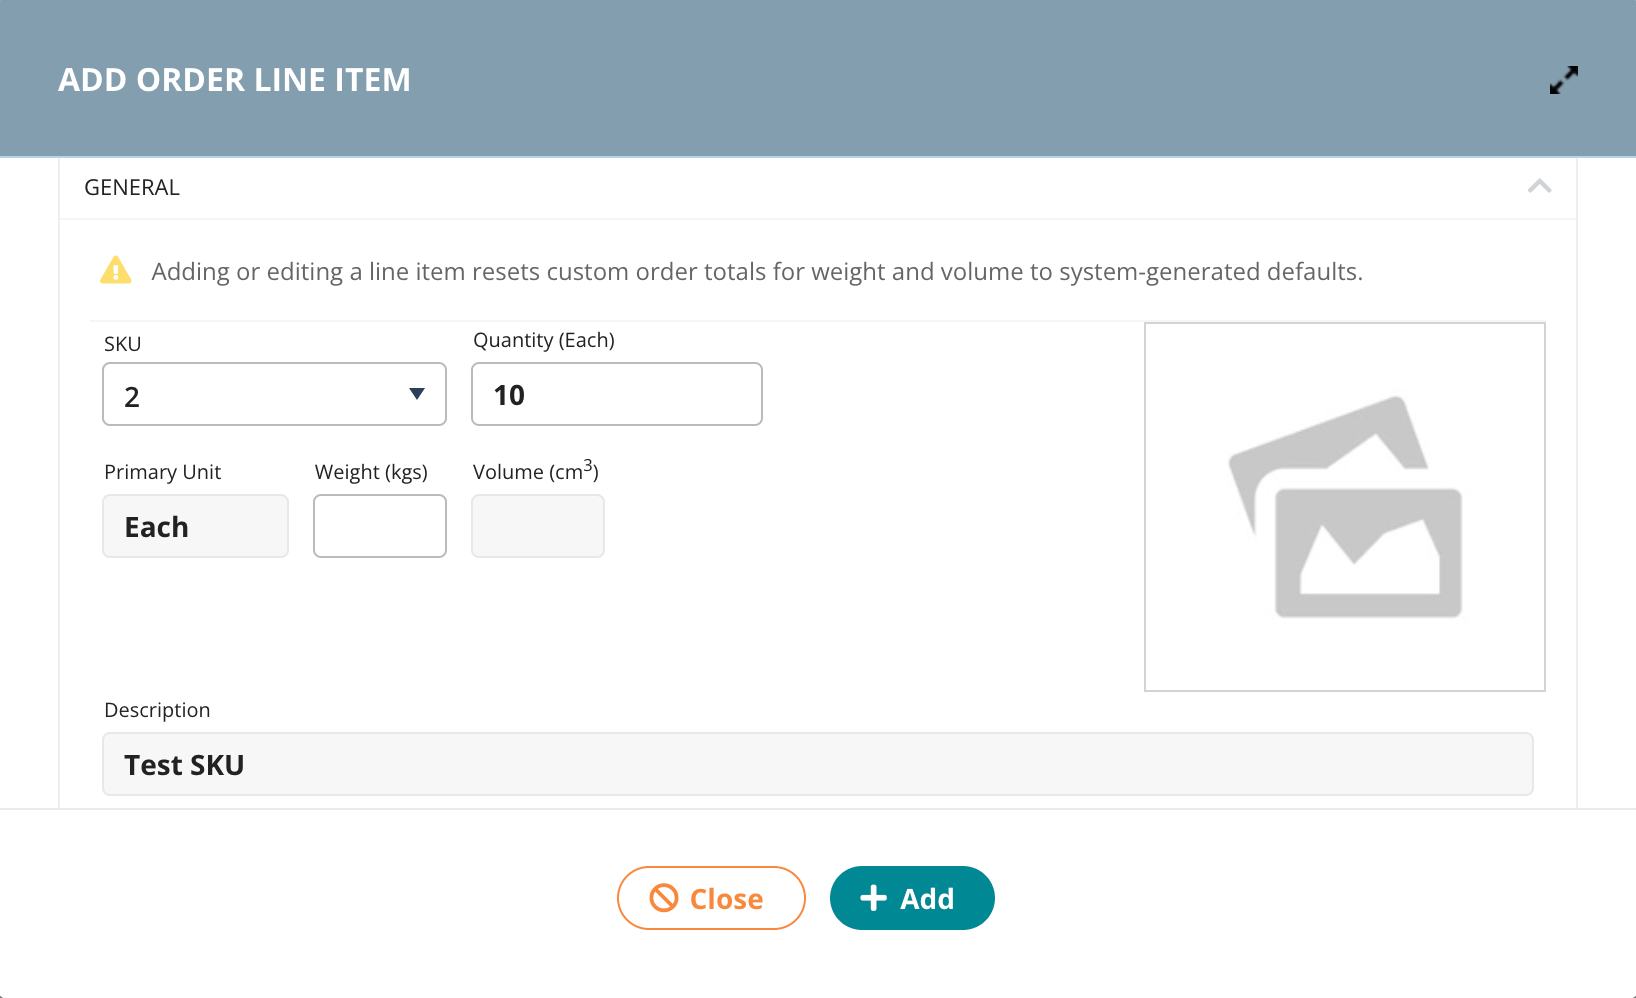
Here you select 'Add' if you are creating an order with few item numbers or 'Mass Add' if you are creating an order with multiple item numbers.

Details: "Add": You start by clicking on "SKU" to select an item number. Next, select the number of pieces you want to order based on this item number. For example, in a screenshot below, you are ordering out 10pcs of SKU2. You select "Add" to add an order.
You can go ahead and select more item numbers or select 'Close' when everything is completed.
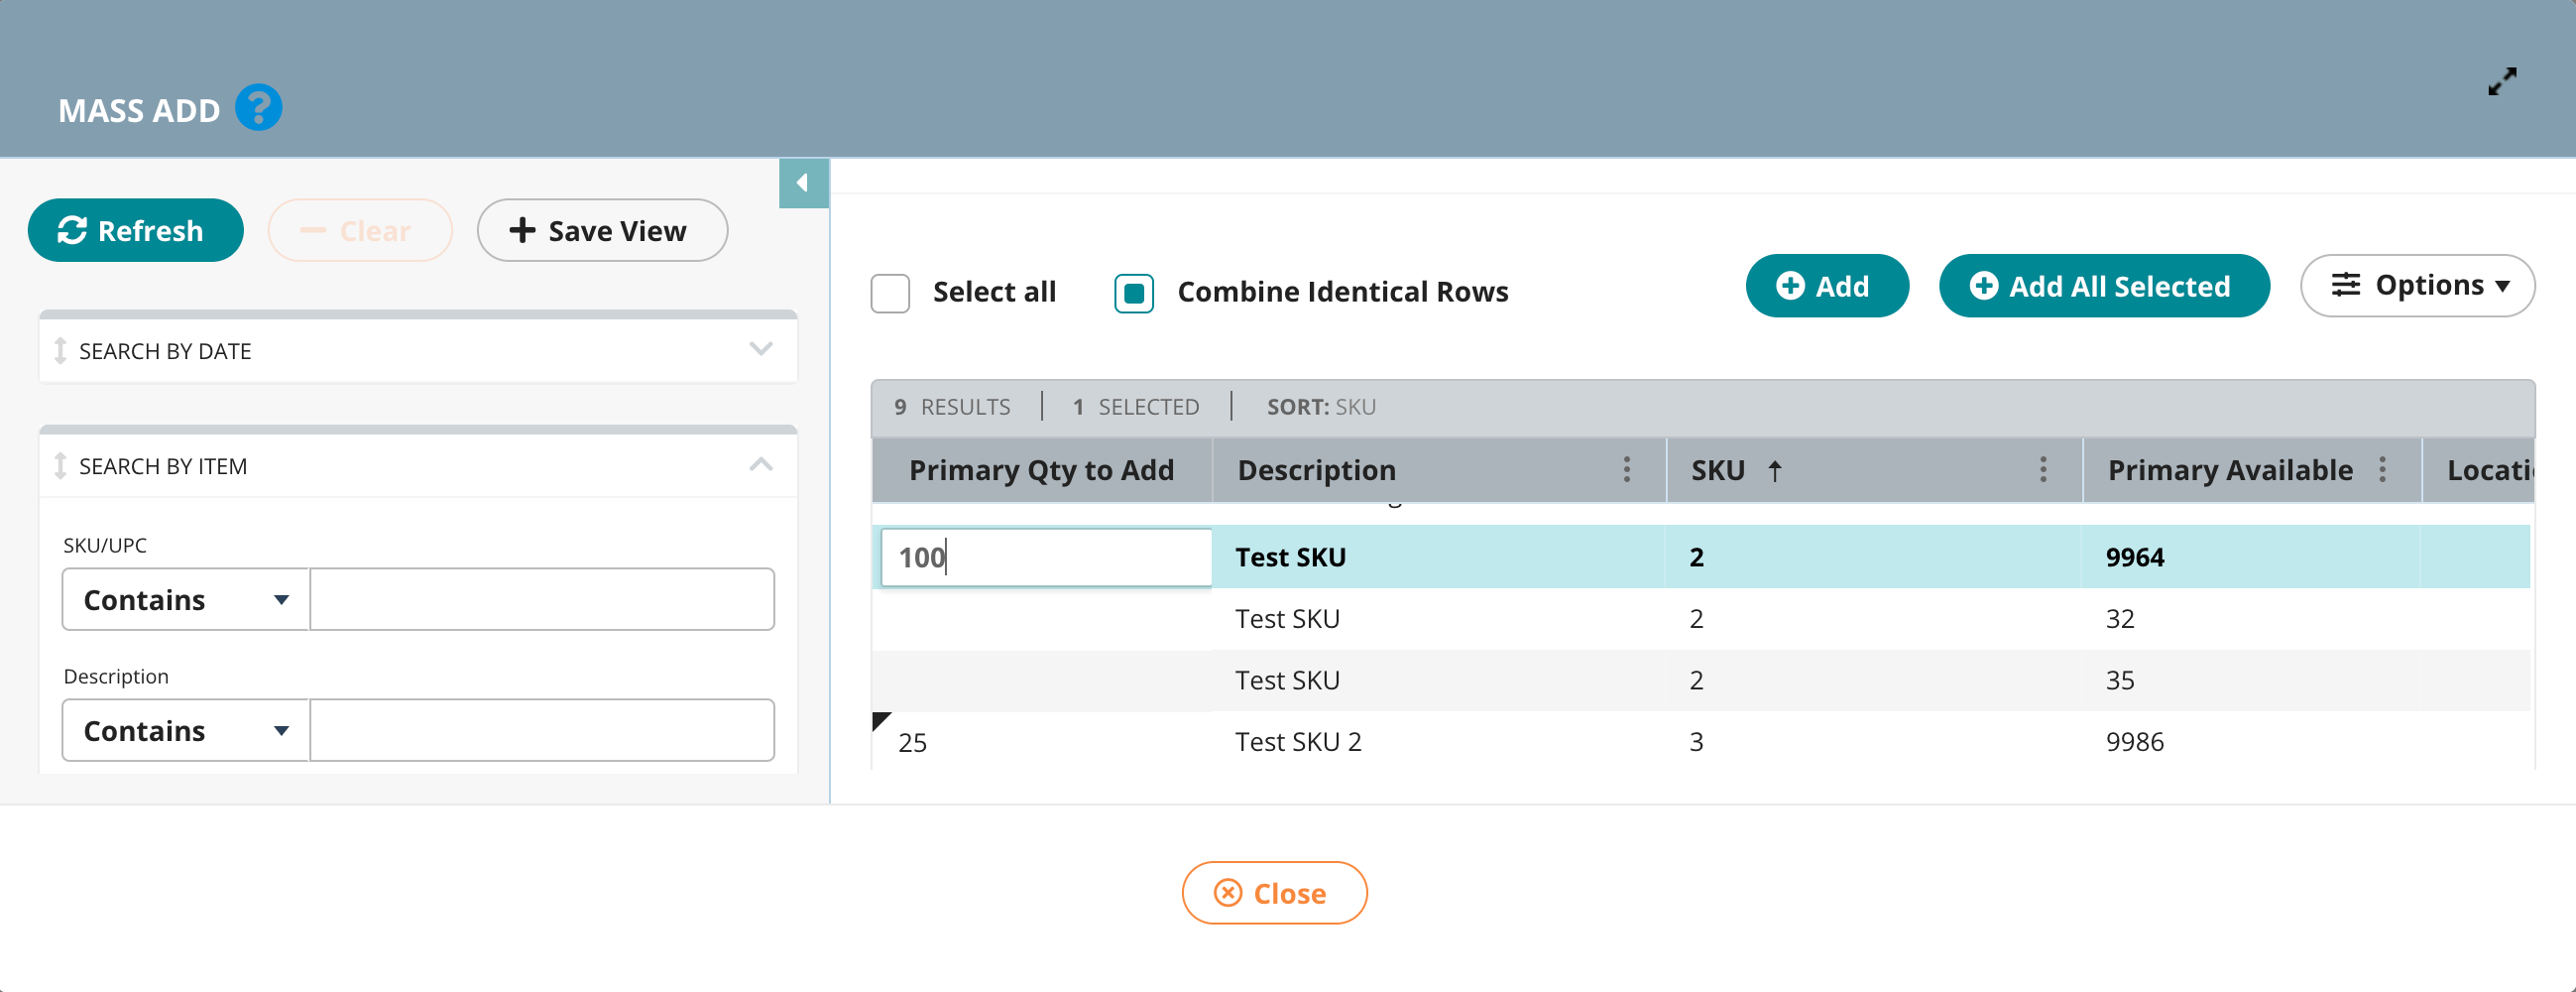
Details: "Mass Add": This is more of an "advanced" ordering route. But a more convenient menu if you want to order out multiple product numbers at once.
As an aside, you can see the inventory level of the relevant item. Plus, there is a menu on the left where you can search for products by SKU number, name, date, lot number and so on.
Tip: We recommend checking 'Combine Identical Rows' for a more convenient dialog.
Under "Primary qty to add", select the number of item numbers you want to add to your order.
You can select as many item numbers as you want, enter a number of pcs and click "Add" to add items to your order.
Finally, select "Close" to proceed and complete your order.
Next, select the shortcut "Carrier and Routing".
6. Flutningsaðili og leið
"Carrier" is the only field you need to fill in here.
You can write and search by delivery method. Or, click the arrow to the right of the field and select the distribution method that works best for this order.

7. Complete an order and send it to the front desk
To complete an order and send it to the front desk, click the yellow button, "Mark as Complete".
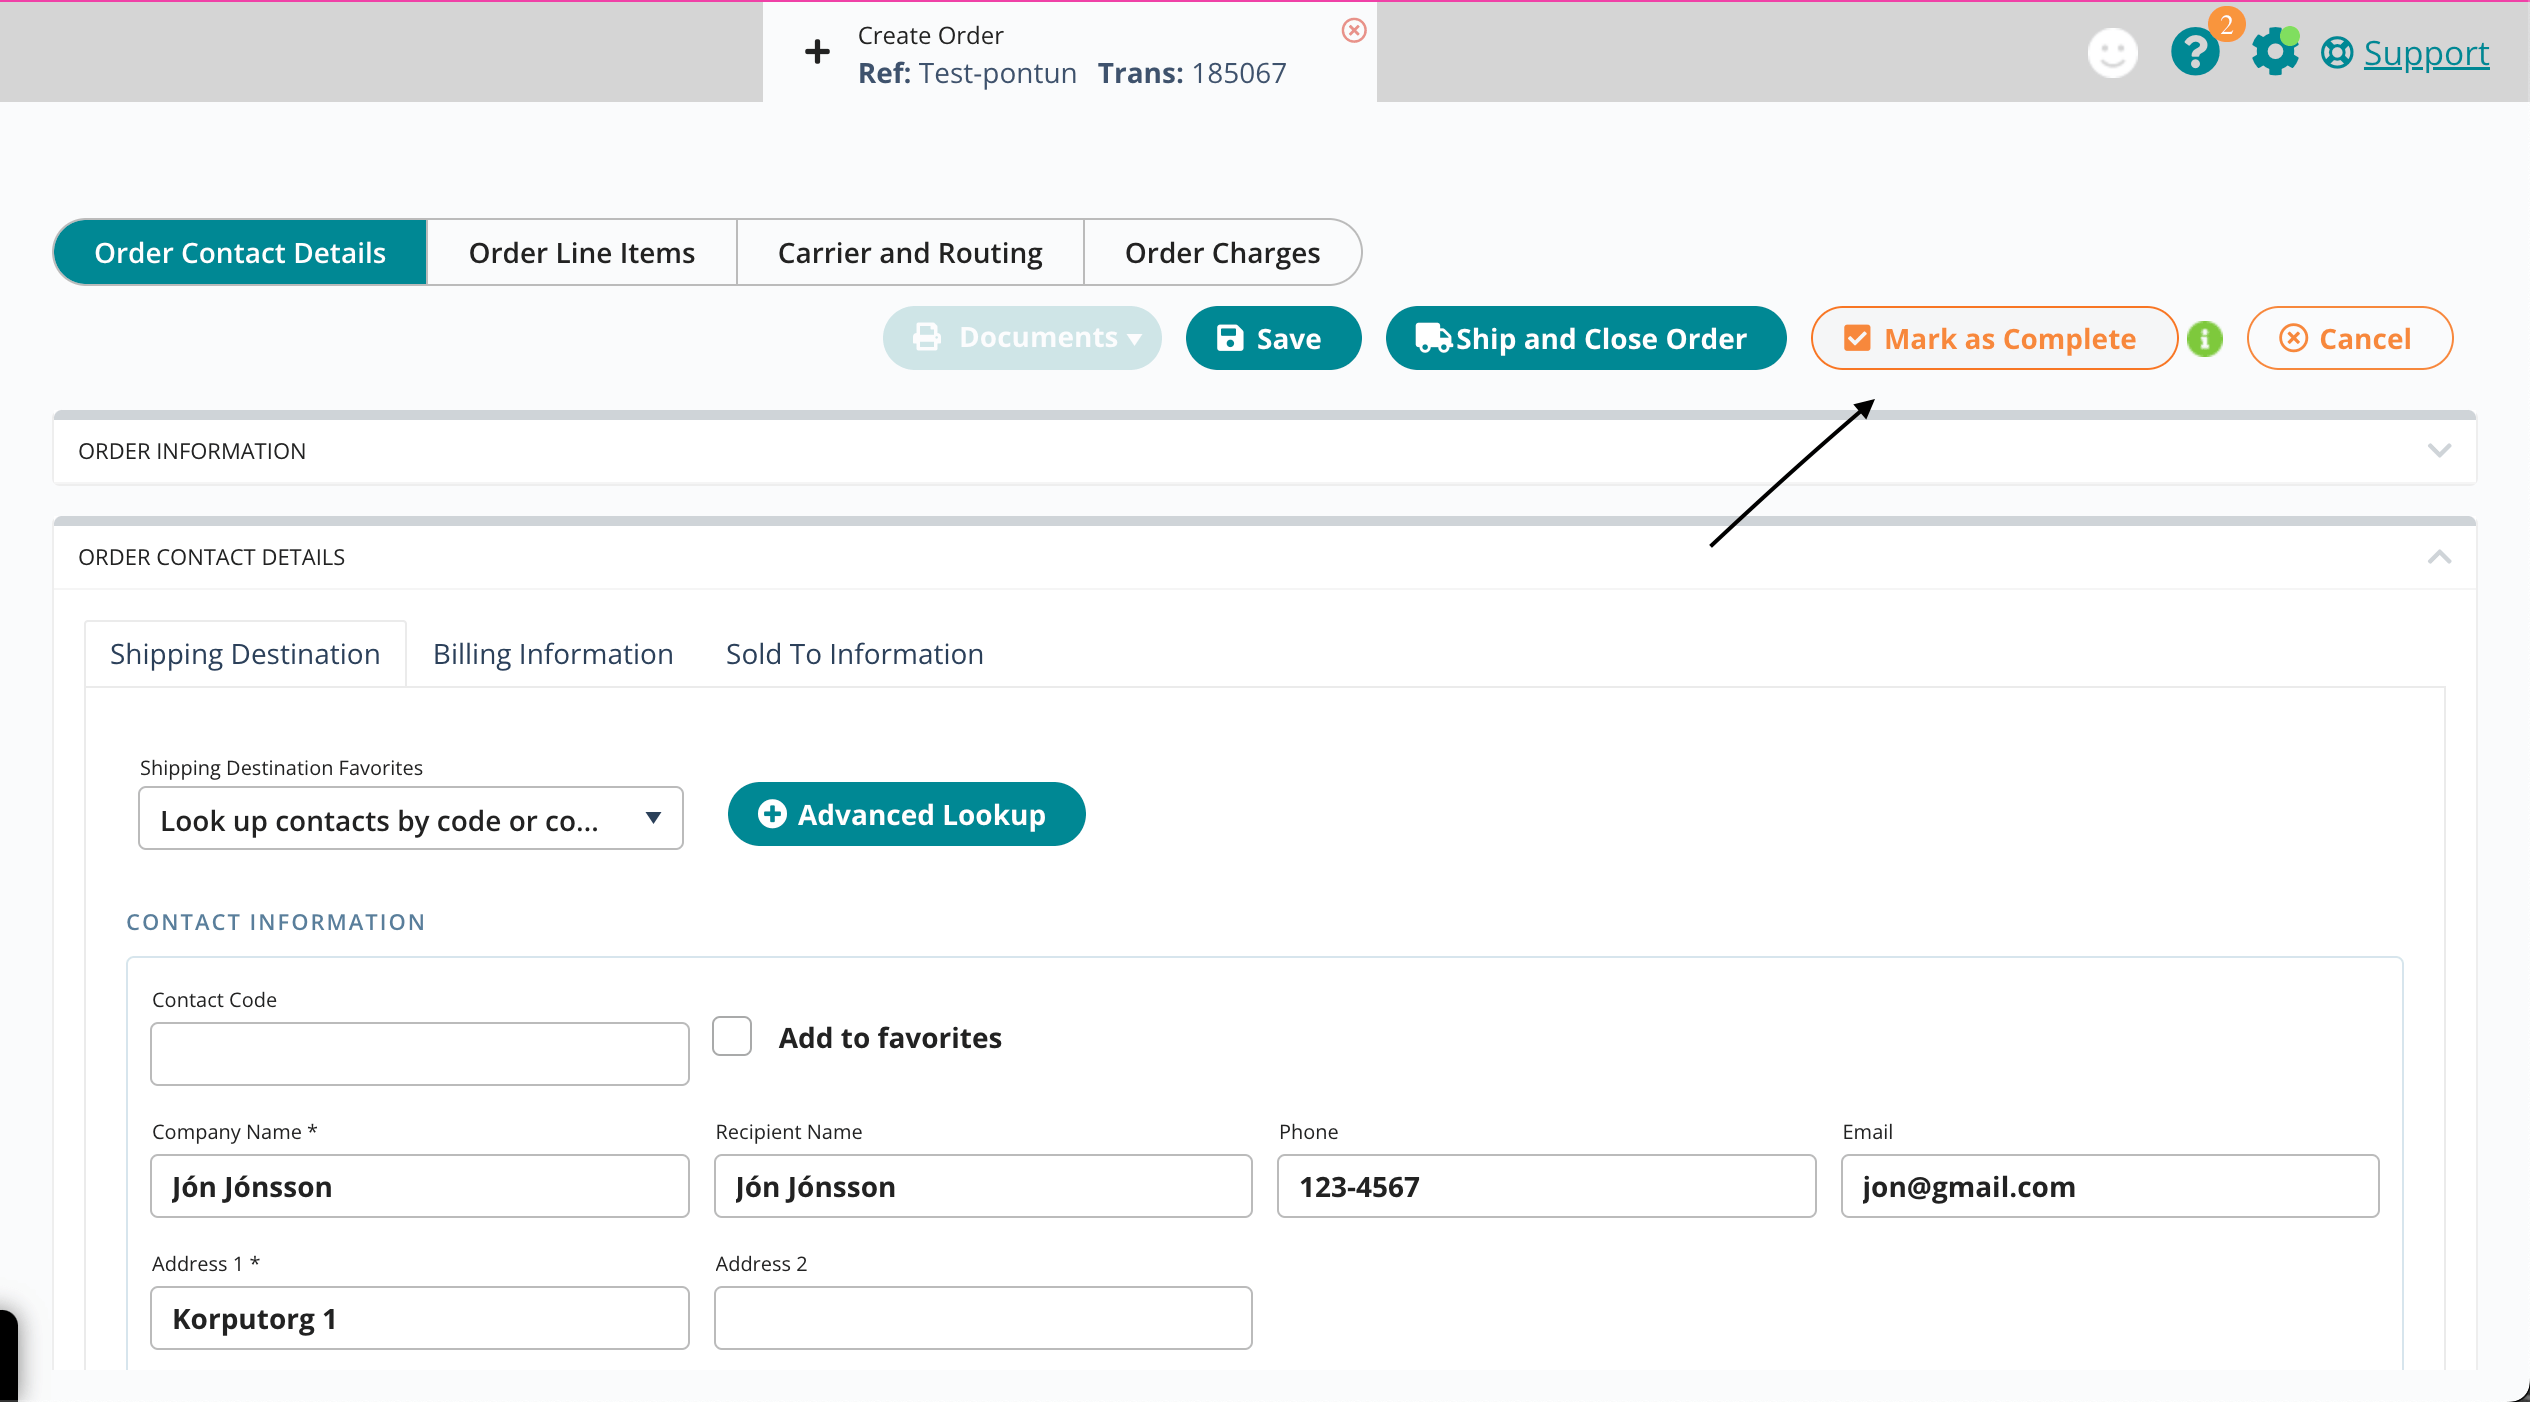
"Mark as Complete" means that your order is ready to be processed. With the click of the button, your order pops up with our staff in stock and we process your order in one green.
Finally, you select "Close" to leave this order.
Congratulations, you have made your first order 🥳
